
Lesson 4
Here are the pictures for this lesson:
http://www.mediafire.com/download.php?t0fv22yv4i2eqw7
The Mediafire file is called Lesson 5, but it contains the pictures for this lesson and for Lesson 6.
Now we will make the other maps for our clothing. First, we will create the "Clothing Specular" map. This is an optional map, which affects the appearance of the clothing. If you want a very glossy look, you should use this map. If you want a flatter appearance, you do not have to use it.
Note from WendyPan: I often do not use this map but use a plain black specular map. I think the specular map works best on sleepwear and swimwear or other clothing without a lot of texture. If you use it on clothing that has a lot of texture, it can make the clothing look thick and rubbery. However, it is a matter of personal preference and you should experiment with using this map once you learn how to create it.
Open your project in GIMP. Make sure that the box "Load mipmaps" is NOT checked.

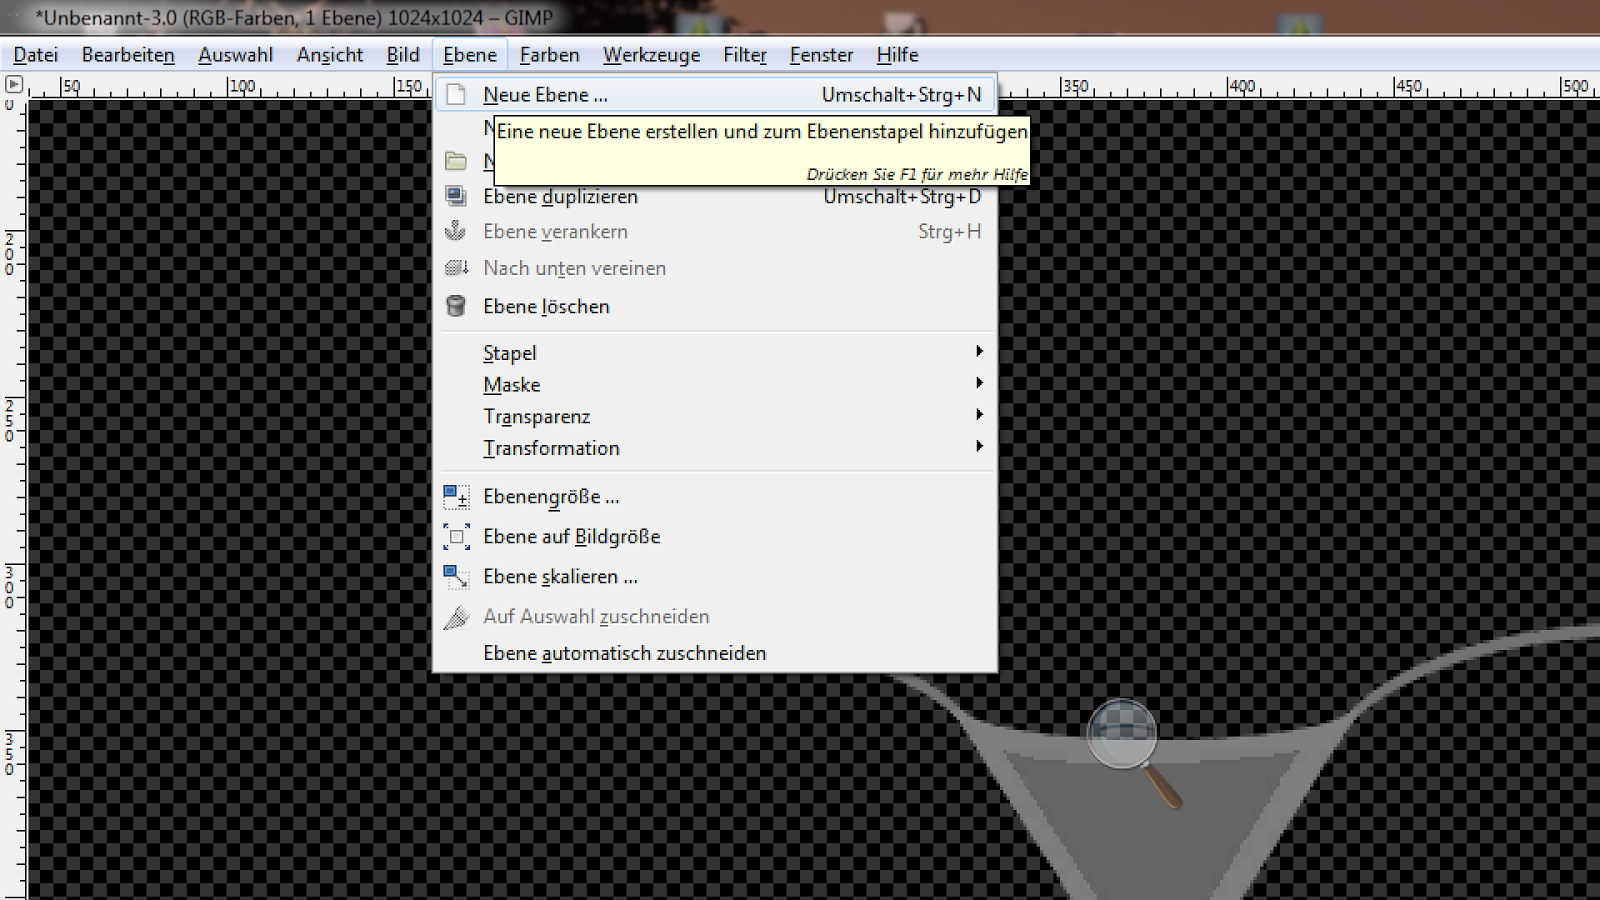
Go to the top menu and select "Colors" -"Brightness/Contrast".

Go to the "Brightness" bar. Slide the cursor all the way to the left. Press "OK".

Go back to the top menu and select "Filter" - "Colors" - "Decode Alpha exponent".

Now your texture has a black background. Export the texture as "boyshorts specular" to the desktop now. Be sure you save it as .dds. Select "Compression" BC3/DXT5 and check the box "Generate mipmaps".

You have made the "Clothing Specular" map!
Now we want to make the normal map. This creates a structure to your clothing. First, you want to go to your top menu and select "Edit"-"Undo alpha exponent"-"Undo Brightness/Contrast."
If you have not yet installed the "Normalmap plugin," then you should close out your project, install the plugin, then open your project again.
There is one more thing you need to do before starting the normalmap. Go to your top menu again. Select "Layer" - "New layer". Press "OK." You do not need to name the layer. The new layer is a way to make a new alpha channel.
Go back to the top menu and select "Layers"-"Merge Down." You can also right-click on the layer and choose "Merge down." Now, you have a new alpha channel.

Go to the top menu and select "Filter" - "Map" - "Normalmap".

Set "Scale" at 10.0000, or maybe a little lower as long as the entire structure of the project is covered. Set the "Height source" as "Average RGB," and the "Alpha channel" as "Set to 1." Go the box on the far right-hand side called "Options." Select"Invert Y". Then press "OK".


A popup window will appear. For "Mode," select "RGBA", then press "OK".

Now you have another greyscale picture.

Again, go to the top menu and select "Colors" - "Components" - "Compose".

A window will appear. Use the dropdown menu to select "RGBA." Next
Select "Green" for the "Red channel"
Select "Green" for the "Green channel"
Select "Green for the "Blue channel"
Select "Red" for the "Alpha channel"
Then press "OK".

These steps are very important. If you make a mistake, your clothing will look very strange in the game.
A new window will appear. This is your "Normal map!"

Export the texture to your desktop, as always. I use "boyshorts normalmap.dds" for the name. Select "Compression" BC3/DXT5 and check "Generate mipmaps".

Save your project in Gimp and close the program. Now it is time to look at your work!
Open the TSR Workshop and load your saved project.

Go to the "Texture" tab. Go to the Clothing Specular row. Click in the blank field to the right of the Clothing specular map. Press on "Edit". Another window will appear. Go to the top menu of this window. Click on "Import" then browse for your specular map, the"Boyshorts specular.dds." Then press "Done".

Now go to the "Mesh" tab. Leave the two sliders alone. Those are used for fat and pregnancy morphs. Click on the downwards arrow in the blank area and select "High level of detail.

Click on "Material," and then click on the three dots. A new window will appear.
Click in the field to the right of the "Alpha Map" and import your "Multiplier" texture. Do the same for the "Diffuse Map" field.
In the "Normal map" field, mport the "boyshorts normalmap.dds" that you just created. Import your specular map again in the "Specular map" field.
Click "Done."

Go back to your detail bar. Repeat these steps for the "Medium level of detail" and for the "Low level of detail". (These two steps are not really necessary if you are just going to use the clothing in your own game, but if you plan to upload your creations, it's an obligation!)

At this point, you can either get the clothing ready for upload or you can take a look at the project to see how it looks in the game. If you want to finish it up, skip to the next lesson. If you want to see how the project looks, go to the top menu of the Workshop. Click on "Edit" - "Project contents".

Press "Export" - "To .Package". Type in a name for your package. I used "Boyshort tutorial." Then press "OK."

Put the .package file in your "Mods" - "Packages" folder, and start the game.
If you are happy with how your project looks, then you may want to take some screenshots of the front and back of the project. Take closeups because you will be making your thumbnails from these snapshots. I will explain how to make the thumbnails in the next lesson. Don't bother taking the screenshots, though, if you have not set your patterns as you will have to go back in and take more screenshots to make thumbnails for the other versions of your project.
If you are not happy with your project , then go back to GIMP and work on your Multiplier map to improve it. You will have to make your other maps again if you change the Multiplier, but once you learn how to make the other maps, the other maps can be made quickly.
End of Lesson 4
No comments:
Post a Comment