
Lesson 5
http://www.mediafire.com/download.php?7z7audu4sc8krdc Originally, this was Lesson 4, so that is what the Mediafire file says. Besides being relocated in the tutorial, this Lesson has been extensively reorganized, so the pictures are no longer in order. Sorry for any inconvenience.
Start the Workshop now and open your saved project. In the Workshop window are three tabs at the top of the screen: "Project", "Texture" and "Mesh".

The first line under the "Project" tab is "Title." If you have not yet given your project a name, you may do so at this time. Click on "Edit," type in the name of the project, and "Copy to All." Then press "Save."
A word of warning from WendyPan: If you have not yet made your thumbnails or if you plan to make your project base game compatible, continue to use a working title and do NOT give the project its final name. In fact, EACH time you take your project in and out of your CAS, you should give it a slightly different name, such as "Boyshorts v2," then "Boyshorts v3." If you use the same name each time, the game will read the new version as a duplicate and IT WILL NOT SHOW UP IN YOUR GAME.

The second line is the field "Age." That shows the age group of your current project. NEVER MAKE CHANGES HERE!!!! One of the common errors that people make is to check the box for teens. Teens have a smaller figure than Young Adults and Adults. If you check the box for teens, your project will appear in CAS under teens, but you will have cut lines and the project will show up as corrupt in some of the tools that check custom content. The only categories that have the same body size and shape are Young Adult and Adult. If you want, you can make your project for only one of those categories, but there is really no point in doing that.

The next field shows the "Gender" of your project. NEVER MAKE CHANGES HERE!!!! Again, if you check both genders, your project will show up as corrupt. There are accessories which can be made for both genders, but accessories are made differently than clothing items.

The next field, "Species," is only important if you make items for animals.
The field, "Handedness," is only used for Accessories.
"Type" shows the type of the item. NEVER MAKE CHANGES HERE!!!

The field "Clothing Type" shows whether your project is a fullbody outfit, a lower body outfit, also called a "bottom," or an upper body outfit, also called a "top," etc. Again, do not make changes here or your item will show as corrupt.

The next line, "Categories," shows the CAS categories in which your clothing will appear. DO NOT CHECK THE NAKED BOX! The naked category is used ONLY for tatoos, makeup, and certain accessories. If you check it for a dress, pants or other clothing items, the sim will wear those in the shower. Again, your item will appear as corrupt.
It is best NOT to check the boxes for "Singed," "MartialArts," and "FireFighting," either, as that will interfere with the default game items.
Do NOT check the box for "Maternity" unless your mesh has the morphs for pregnancy.
"ValidForRandom" means that the game will use these clothes preferentially for NPC Sims. Use this category sparingly.
The field "Makeover" is for clothing which can be used for a makeover. Use this category sparingly as well.
I don't know what the "CategoryMask" category is used for.
DO NOT CHECK "IsHiddenInCAS" or your clothes won't appear in CAS!
You can check and uncheck other standard categories, such as everyday wear, formal wear, sleepwear, athletic wear, swimwear, and outerwear.

In the next line, "Parts," you can change the other clothes that the sim wears in the Workshop. We have made a nice bikini bottom, so if the sim appears in the TSRW wearing a long top and snow boots, you may want to change those. Just click on the plus sign next to parts, and then click on the three dots next to the key. A small CAS will appear. Click on the item you want. Then press "OK."


In the next line, "Extras", you can insert a picture which will be used as the Launcher thumbnail. You will learn how to make thumbnails in Lesson 6.

Now we go to the next tab, "Texture." At this point, if you want to make more than one version of your project, you should delete the old variations and add new ones. To do this, go to the line immediately under the Textures tab. This line contains the title of the project. If you have already given the project a name, that name should appear in this line. If you have not yet changed the name of the project, it may say something like "afbottom brief Boyshorts."
Click on this title. A dropdown menu should appear. Do NOT do anything to the first line. The first line is your project! Highlight the second line. What should appear in the TSRW is the second version of the original mesh. Click on the downwards arrow in the box to the far right. You should get another menu. Click on "delete." Another popup window will appear asking you if you want to delete this variation. Click on "Yes." The window will disappear.
Repeat this step for the third line and any other variations there are.


Now decide how many variations you want to make. Go back to the box on the far right. Click on it and then click on "Duplicate." You may get a popup window saying that your variation has changes and asking if you want to duplicate the project. Click on "Yes." Repeat this step one or more times, depending upon how many variations you want to make.
The next line says "3 channels" and "4 channels." Click the dot next to 3 channels for this project or for any project which has 0 - 3 channels that are recolorable. Click 4 channels only if there are four channels which are recolorable.
The first map is the "Overlay" map. This map is used for trim or other items, such as buttons, zippers, or cords. You can also use it for logos or even as a stencil. The Overlay map is made very similarly to the way you make your Multiplier map and it is also a .dds file.
Our project does not have an overlay, so click in the field "Overlay" and press "Edit". A window should appear. Press "Make empty", and then press "Done".
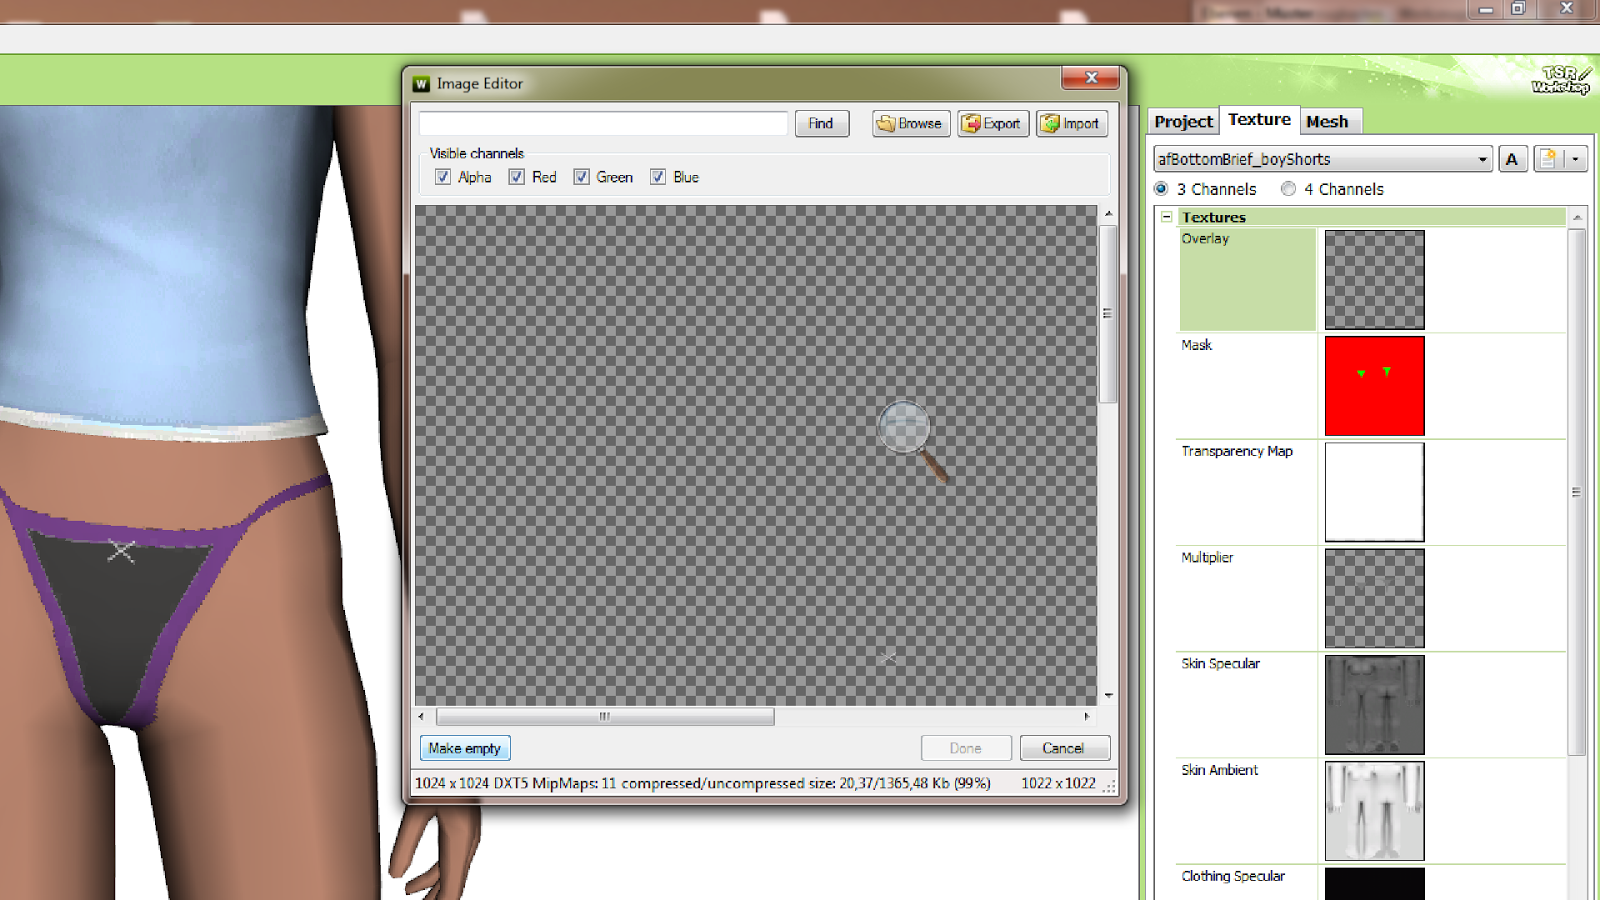
Note from WendyPan: This mask is what enables the item to be recolored in different channels. If your project is going to be all the same color, then you can use a plain red mask.

I don't know how to use the Transparency Mask. There is a separate tutorial in WendyPan's adult blog on how to make texture transparent. If you want to make clothing truly transparent, though, you must alter the mesh.
The "Multiplier" map is, of course, for your base texture.
You do not need to modify the "Skin Specular" or "Skin Ambient" maps.
The "Clothing Specular" field is for the specular map you created previously. If you do not want to make or use a "Clothing Specular" map, you can use a plain black specular map.
The next three fields are "Clothing Ambient", "Logo" and "Partmask." I have never used those.
If you have not done so already, now is the time to set your patterns and colors. Pattern A controls the color and pattern of the Red channel, Pattern B controls the color and pattern of the Green channel, and Pattern C controls the color and pattern of the Blue channel. Pattern D controls the color and pattern of the Alpha channel.

Our project has only two recolorable channels. The original mesh has three recolorable channels. So, the first thing you must do is "unenable" pattern C. To do this, you click on the plus sign next to pattern C. Next, click on "Enable." From the dropdown menu, highlight "False."

If you want to change Pattern A, click on "Pattern A, " and then click on "Edit." A new window will appear. If the pattern is already a solid color and you only want to change the color to another solid color, just click on "Color." Then click to the right of the numbers and click on the downwards arrow.
Another window will appear. To change the color, you can use the "Hue bar," the color box, which is similar to the color sphere in CAS, or change the hex numbers.

If you want to change the pattern at all, including changing it to or from a solid color, you should first click on Pattern A and the Edit button. Then the window will appear. Click on the folder in the upper left corner of the window. This will bring up a patterns menu similar to the one you get in CAS. If you want to use a solid color pattern, you will find that in Miscellaneous. Other patterns can be found in the dropdown menu under "Fabrics," "Abstract," etc.
Choose the pattern you want and click on it and then click on "Done." You will now see a window for the Pattern Editor. Depending upon the type of pattern you choose, you may see several colors listed. You may change those colors the same way you changed the solid colors.
If you have a complex pattern, though, you may see HSV settings. You can click on each of these and change them in much the same way, but you cannot use hex numbers. Hex numbers basically correspond to RGB numbers. "HSV" stands for "Hue," "Saturation," and "Value." You can find these numbers when editing colors in CAS or in GIMP.
Repeat this if you want to change colors or patterns in the next channel, Pattern B.
Repeat all these steps, including "unenabling" Pattern C, for all of your variations.
The next line is "Stencils." Stencils are similar to overlays and they are .dds files. However, they differ from overlays because overlays will appear on each variation of your project. You can have different stencils for different variations of your project. Stencil A would be used for your first version, Stencil B for your second version, etc.
You also can use stencils for logos or for custom or very detailed patterns that would be difficult to incorporate into the texture of the project. WendyPan used stencils in her Hurley Stencil Tees. She did not manipulate the texture or mesh of the Tshirt in any way, but used the stencils to change the logos on the four Tshirts.

After Stencils, is "PartsHighlighting." Click on that and you will see a line for "CAS Thumbnail." I will tell you how to make thumbnails in the next lesson.
I have never used the fields "Transparency", "Setting" and "Logo", so I cannot say for what they are used.
We addressed the Mesh tab in the previous chapter.
All you need to do now is make your thumbnails and, if necessary, make the item base game compatible. I will tell you how to do that in the next lesson. If you do not want to make thumbnails, and I do not recommend that if you want sims creators to give credit for your creations, and if you do not need to make your project base game compatible, you can now package up your project.
To do this, go to your top menu. Click on "File," "Export," "To Sims3Pack." In the window that appears, type in the name of the project and then save it. Make sure it is saved to your Desktop!

End of Lesson 5
No comments:
Post a Comment